How to Seal Air Leaks Around the Home for Year-Round Savings
 Air leaks around the home can waste a lot of energy. When it’s summer and your air conditioner is running full blast, cool air escapes and warm air enters. In the winter, the reverse occurs — valuable heat escapes and cold air gets sucked in.
The gaps and cracks, which add up to the size of an open window in the average home, can also create easy access for unwanted insects and animals. Spiders and bugs can enter through holes 1/16 of a millimeter, adult mice can fit through a dime-sized hole, and rats only need a quarter inch.
Plugging up your home will help protect your home against unwanted air, water, and pests. Using cheap materials, like caulk and weatherstripping, you will start to notice a difference in comfort and pest control on day one and see a return on your investment in a year or less. And you can do it yourself!
Warning: Keep Ventilation in Mind
If you embark on any significant air sealing project, make sure you speak with a certified HVAC technician about proper ventilation levels. Without the right amount of ventilation, dangerous gases and excessive water vapor can build up inside the home. Your indoor air quality should not be compromised for energy savings.
Air Sealing and Insulation Benefits
- Helps absorb sound, reducing noise from inside and outside
- Ensures mild conditions for storage, preventing heat-related damage and wear
- Reduces the amount of pollen, dust, and pests entering the home
- Reduces the risk of ice dams
- May allow for a smaller, cheaper HVAC system
- Saves money all year long on heating and cooling costs
- Increases comfort and improves durability
- Healthier indoor environment (when combined with effective ventilation)
Two Options for Finding Air Leaks
To figure out if you have air leaks in your home, you have two options. First, a certified technician can come out and perform a home energy audit. By performing a blower door test, the technician can pinpoint any air leaks in the home and then help you strategize a plan to seal them. The second option is testing for air leaks yourself with a visual inspection.
How to Test for Air Leaks
 For indoor leaks, you can use a lit incense stick or thin piece of toilet paper and hold it up to areas where you suspect an air leak. If the smoke or paper begins to move erratically, you have unwanted airflow in that area.
Conduct the incense/toilet paper test around all your doors, windows, baseboards, fireplaces, and where utilities run through walls. Outside, you will want to conduct a visual inspection for gaps, cracks, and old or inefficient sealants. If your chimney runs along an outside wall, caulk the area where it meets the siding.
Replace any old or ineffective weatherstripping and use caulk to seal gaps between window frames and door frames. On the exterior of your home, use weatherproof caulk for any cracks less than a quarter of an inch and expandable foam spray for any gaps larger than that.
You will also want to inspect and seal leaks in your air ducts. You can test whether you have air leaks in your ductwork by holding a piece of lit incense or a thin piece of toilet paper near the duct connections around your home. Of course, this will be difficult to do if your air ducts are concealed or hidden behind ceiling and walls, but try testing the ducts that you do have access to. If there are air leaks in the exposed ducts, it’s very likely that you also have air leaks in the hidden ducts as well. In order to find and seal all the hard-to-reach areas, contact a duct sealing professional.
Where to Test for Air Leaks
Use the image below to start locating air leaks in your home:

Source: U.S. Energy Department
Common Household Air Leaks
- Windows and Doors
- Attic Hatch
- Behind Kneewalls
- Electrical Wiring
- Plumbing Vent
- Furnace Flue or Chimney Shaft
- Air Ducts
- Basement Rim Joists
By sealing even some of the areas marked in the image above, you will improve your home’s comfort, durability, and energy efficiency.
Where to start:
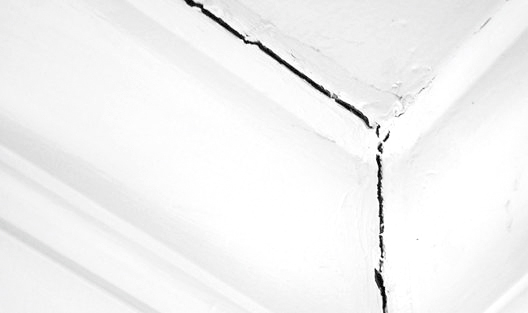
- First, inspect all areas where two different building materials meet on the outside of your home — corners, the water spigot, the spot where the foundation and the bottom of the siding meet are all examples of where to look. Make a note of all the gaps and cracks you find. While you’re outside, make sure your dryer vent is not blocked by anything. This will improve efficiency and help prevent a fire.
- Next, check the inside of your home for any cracks or gaps near your electrical wiring, outlet/switch plates (install foam gaskets behind them), baseboards, vents, fans, windows, and door frames. Keep your fireplace flue securely closed when not in use.
- Look for air leaks in the basement, specifically where the wood framing of the house sits on the foundation (rim joist).
- Finish in the attic. Air leaks in the attic are likely to be found in the attic floor, attic walls, and ceiling. Dirty spots in the insulation normally indicate an air leak. Sealing attic air leaks is a major project, so consider hiring help. You may also want to increase your attic insulation at the same time. Put attic air sealing on the top of the to-do list if you notice wet insulation and mold. Otherwise, start with the easier projects first.
It’s important to identify all the areas where you intend on sealing air leaks so you know what materials you’ll need.
How to Seal Air Leaks Around the Home
Once you’ve identified areas in your home where air escapes, decide which job to tackle first. The most obvious air leaks are around doors and windows.
Doors
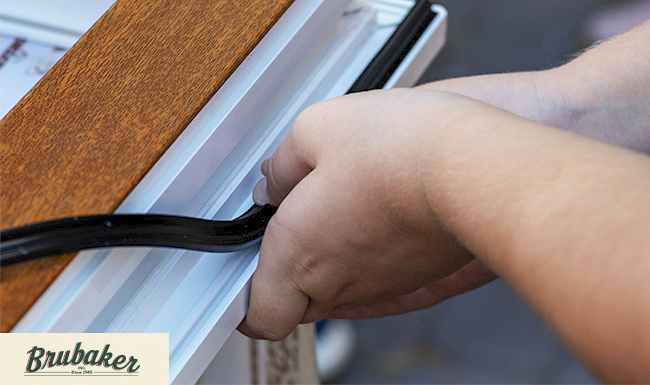
Update the weatherstripping around your exterior-facing doors. “V-strip” and “compression” are the most effective types of weatherstripping for doors. Simply follow the instructions on the weatherstripping packaging. Keep in mind that you may need a hacksaw to cut the weatherstripping to size.
To seal the bottom of the door, a door sweep with a pliable sealing gasket is needed. While there are adhesive options available, we highly recommend the more durable screw-in type.
You may also want to install or replace door thresholds, which fills the gap between the door and the floor.
Learn more about installing weatherstripping and door sweeps.
Windows
Weatherstripping your windows is much like weatherstripping your doors. For the trim around doors and windows, caulk or non-expanding foam sealant spray is a cheap and easy way to seal air leaks. Use caulk for any gaps a quarter inch or less.
Learn more about sealing behind window or door trim.
Attics
Sealing air leaks and adding insulation in your attic is a complicated and potentially dangerous project. Make sure you are wearing the appropriate clothing, dust mask, and gloves when working in the attic. We recommend speaking with a qualified contractor who can identity problem areas and advise you on specific solutions for your home.
Keep in mind that proper attic ventilation is essential. It helps remove water vapor in the winter and hot air in the summer. Without it, condensation can cause wood rot and attic temperatures can get extremely hot.
Learn more about attic air sealing.
Basements
As with other areas around the home, caulk or foam should be used to seal leaks near the sill, slab, rim joist, doors, and windows. Expandable foam spray can be used around the rim joist area.
Learn more about sealing and insulating basements.
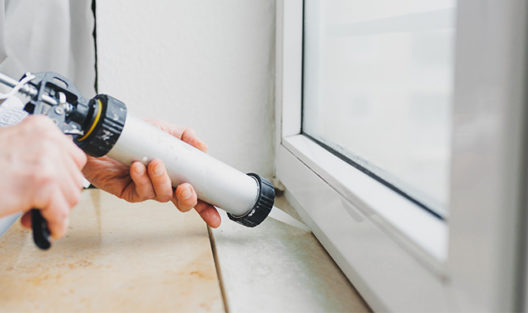 Caulking and Air Sealing Tips
Most home air sealing projects involve caulk and a caulking gun. Here are some tips for using a caulking gun:
- Always read all instructions carefully before starting any project.
- Caulking requires finesse. Practice creating a smooth flow of sealant on some cardboard boxes.
- Cut the nozzle at a 45° angle for more precision.
- Use waterproof silicone caulk for areas that get wet, such as bathrooms and outdoor areas.
- Use latex caulk for indoor baseboards, door frames, and other areas that aren’t exposed to water. They are cheaper and easier to paint over, but will begin breaking down if exposed to water.
- Use non-expandable or low-expansion foam sealant for areas that are larger than a quarter inch where you don’t want too much expansion.
- Use expandable foam sealant for areas where you want lots of expansion, such as plugging holes around your home’s perimeter. Learn how to use spray foam at home.
Contact a Certified Professional
A tight, insulated home may be energy efficient but it can trap moisture and air inside, making proper ventilation more important than ever. Before embarking on any significant insulation project, speak with an HVAC professional about ventilation and indoor air quality. We recommend speaking with a professional before you start your air sealing project to save time and ensure everything is properly executed.
![]() Contact Brubaker Inc. if you need a trusted partner for home improvements and repairs in Lancaster County. One of our licensed and highly trained technicians will take a look and walk you through the problem and your options. The price we say is the price you pay. 24-hour emergency service is available. Call any time, day or night, to schedule an appointment: 717.299.5641.
Contact Brubaker Inc. if you need a trusted partner for home improvements and repairs in Lancaster County. One of our licensed and highly trained technicians will take a look and walk you through the problem and your options. The price we say is the price you pay. 24-hour emergency service is available. Call any time, day or night, to schedule an appointment: 717.299.5641.
